1. Register domain name
You can use freenom.com for free domain name registration. Freenom providing first level domains: .tk, .ml, .ga, .cf .gq for free! You can also use another registrars, but your domain name will either be paid or contain several subdomains.
It’s better to use Google account to sing-up in Freenom. Because it could restrict registration sometimes on other email accounts. Just click “Use social sign in” -> Google on login.
Add any DNS servers to your new domain name. Just to be defined. You can use Freenom’s DNS servers.
2. DNS
Now we should parking our domain name. I recommend to use CloudFlare service. Because it’s providing not only DNS service, but also proxying and SSL-certificates for https connection for free!
2.1 DNS hosting
Register you account on https://www.cloudflare.com/ . You can also use your Google email.
Then add you new domain name into your new CloudFlare account.
Next, you need to change DNS servers for your domain name. CloudFlare will provide 2 DNS servers for you with name.ns.cloudflare.com
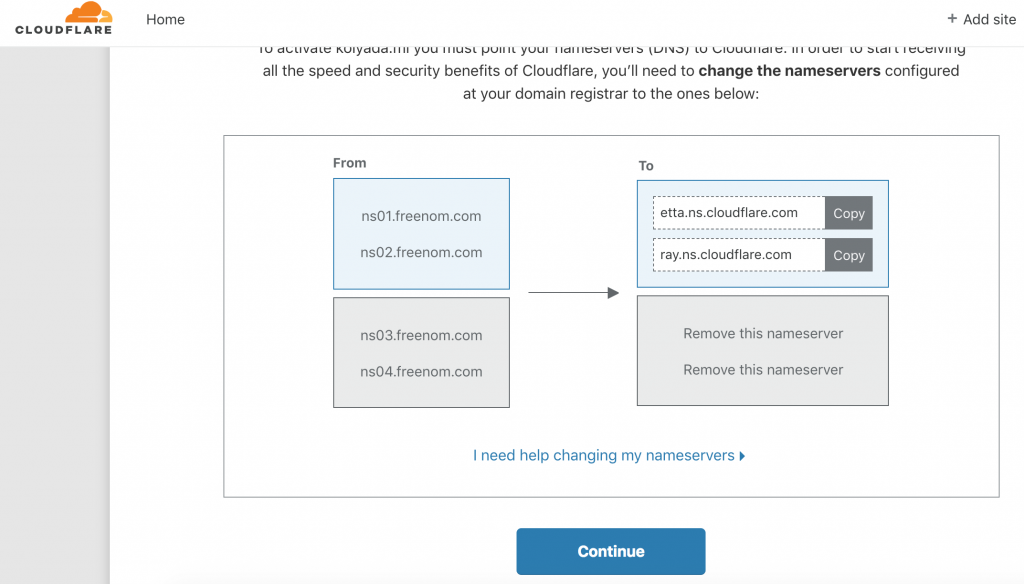
2.2 DNS Parking
Go to your Freenom account at https://my.freenom.com and change DNS servers:
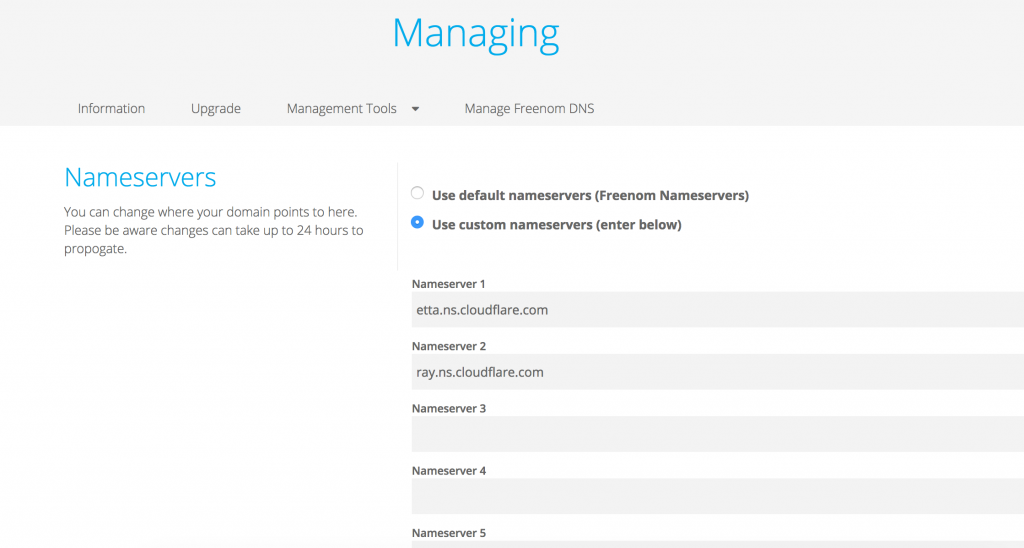
By doing this you will confirm that you are the legal owner of the domain. Only owner can change DNS servers in domain name information. You can check domain name information by whois, dig, host and nslookup services. For example: https://webhosting.info/whois
Wait till CloudFlare will check your changes. After it your site will be active on CloudFlare dashboard.
3. Web hosting
Now we need to choose our new hosting provider. Where our blog will be placed. Here is my comparison table of hosting providers.
| Name | HDD | Traffic | Your domain | Ads |
| 000webhost.com | 1Gb | 10Gb | Free | No |
| wordpress.com | 3Gb | 3Gb | Paid | Yes |
| wix.com | 0,5Gb | 0,5Gb | Paid | Yes |
| webbly.com | 0,5Gb | unlimited | ||
| brawenet.com | 0,5Gb | 1Gb | ||
| x10hosting.com | 1Gb | unlimited | Free | |
| AwardSpace.com | 1Gb | 5Gb | Free | |
| 5gbfree.com | 5Gb | 20Gb | Paid | No |
| freewebhostingarea.com | 1,5Gb | unlimited | Free | Yes |
| freehosting.com | 10Gb | unlimited | Free | No |
| byet.host | 1Gb | 50Gb | Paid | No |
| uhostfull.com | unlimited | unlimited | ||
| freehostingnoads.net | 1Gb | 5Gb | No | |
| infinityfree.net | unlimited | unlimited | Free | Yes |
I recommend to choose 000webhost.com because it’s very popular, stable, fast, have no size limits for a one uploaded file. And will never add any big advertisements on your page.
3.1 Register
Register your new site on 000webhost and you be able to create your blog for free. I recommend to use WordPress as blog engine. You will get free web hostname like yourname.000webhostapp.com . Doesn’t looks good, right?
3.2 CNAME
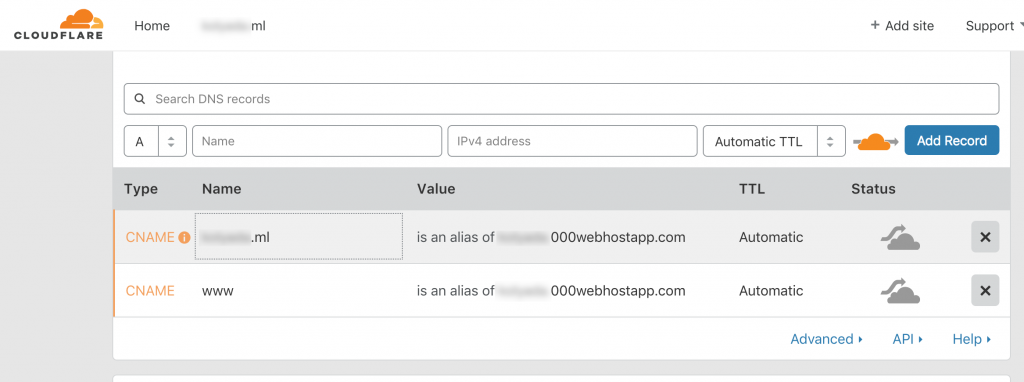
Go back to CloudFlare add your cool top-level domain name www.yourhost.com pointed to yourname.000webhostapp.com from step 3.1 as CNAME.
ATTENTION! Add it without grey cloud proxy icon (at right column). You can set proxy lager, after adding domain to 000webhost.com
3.3 Point domain
Point your cool existing domain (from step 1) into 000webhost. Go to https://my.000webhost.com/
Settings → Add domain → Point domain → Domain
Add your domain as www.yourdomain.com (with www because rood domain has been flatten by cloudflare and will return A record instead CNAME, but 000webhostapp require CNAME)!
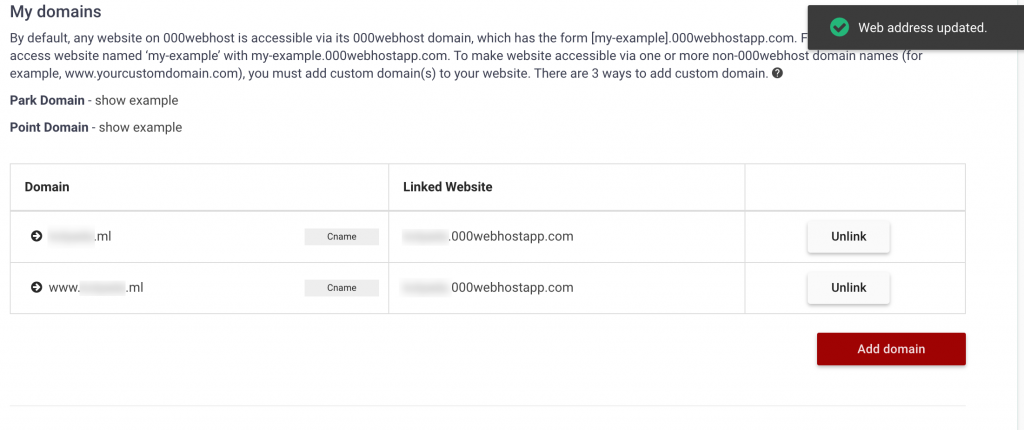 Root domain will be added automatically.
Wait till 000webhost will check your DNS settings (from step 3.2).
4. SSL
Now we a ready to get https -prefix for our blog.
4.1 Encryption
Enable CloudFlare built-in encryption. Go to:
-
- Cloudflare → DNS → Enable proxy (change gray cloud icon to orange)
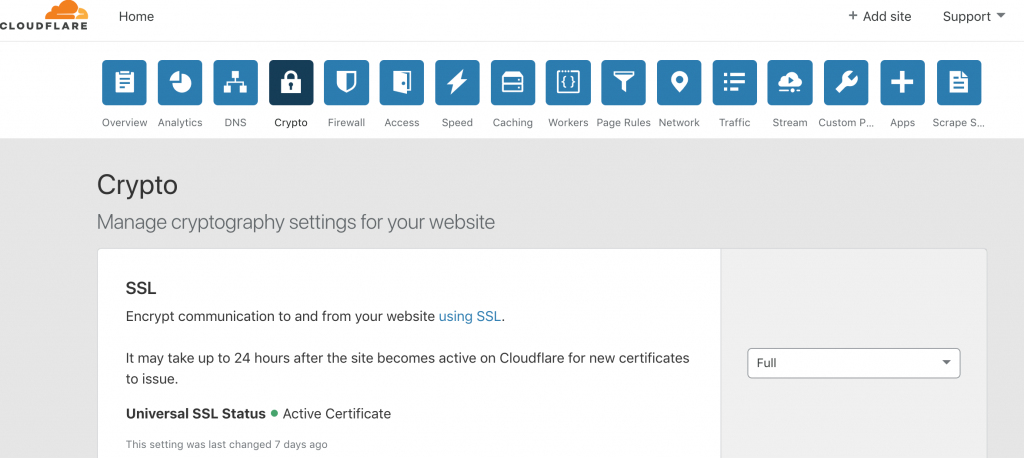
- Cloudflare → Crypto → Full
- Cloudflare → Crypto → Always Use HTTPS & Automatic HTTPS Rewrites
4.2 WordPress
Now you can create your blog (if you wasn’t do it before). Use your top-level domain name from step 1 for it. Or change existing WordPress URL from yourname.000webhostapp.com to www.yoursite.com on Wordpress Settings page, install Update URLs plugin and change URL in Tools → Change URL.
Go to 000webhost.com → Build Web site → WordPress
Then you need to change one settings in WordPress configuration file.
Go to 000webhost.com → File manager → public_html → wp-config.php
Add line:
define('FORCE_SSL_ADMIN', false);
This is required to prevent CloduFlare SSL redirection loop.
Now you be able to open your new free blog at https://yoursite.com !